Tractor Quick Attach Conversion Kit: A Guide to Faster Tractor Work
Tired of wrestling with tractor attachments? A quick attach conversion kit can dramatically speed up your workflow. This guide provides a step-by-step process for installation, along with essential considerations for selection and maintenance. We'll cover everything you need to know to successfully upgrade your tractor. Did you know that a quick attach system can increase your daily output by as much as 25%? For more information on different tractor brands, check out this helpful resource: different tractor brands.
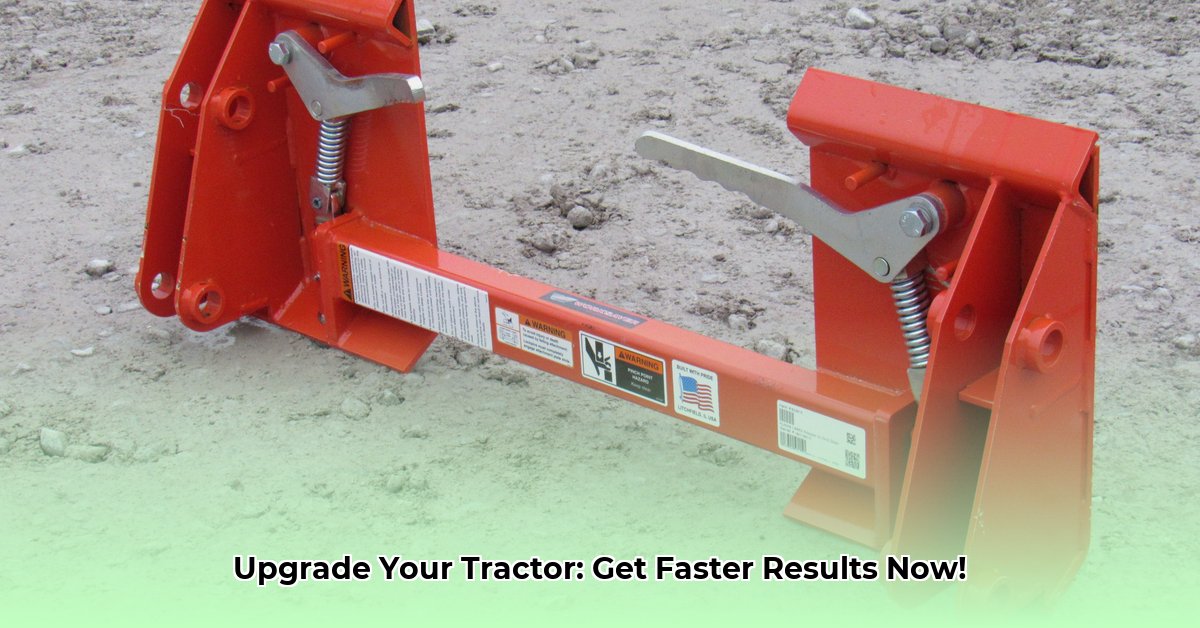
Understanding Your Tractor's Hitch: The Foundation of Your Upgrade
Before purchasing a kit, identify your tractor's hitch category (Category 1, 2, or 3). This information, typically found in your tractor's manual, is crucial for ensuring compatibility. Choosing the wrong category is like trying to fit a square peg in a round hole; it simply won't work.
Picking the Perfect Kit: Size and Quality Matter
The market offers various quick attach conversion kits. Consider your tractor's size and the implements you regularly use. While a higher-quality kit might cost more upfront, its durability and smoother operation will pay off in the long run. “Investing in a high-quality kit is like investing in your own efficiency,” says John Miller, a seasoned agricultural engineer at the University of Illinois. A cheap kit may seem attractive initially, but could lead to frustration and costly repairs later.
Let's Get This Installed: A Step-by-Step Guide
Safety First! Always disconnect the power takeoff (PTO) (the spinning shaft powering implements) and engage the parking brake before starting any work. The following steps are general guidelines. Always refer to your kit's specific instructions.
Step 1: Preparation Gather your tools: sockets and wrenches (various sizes), possibly jack stands (depending on your tractor and kit), and a torque wrench (essential for precise bolt tightening).
Step 2: Removing the Old Hitch Carefully remove your tractor's original three-point hitch (bolts and pins). Take photos during disassembly as a visual reference for reassembly.
Step 3: Mounting the New Kit Position the quick attach conversion kit precisely according to the manufacturer's directions. Accurate alignment is crucial for smooth operation.
Step 4: Secure Tightening Tighten all bolts to the manufacturer's specified torque settings using your torque wrench. This guarantees a secure and safe installation.
Step 5: Test and Inspect Connect a compatible implement, raise and lower it carefully. Check for smooth operation and any leaks. If anything seems amiss, double-check your work.
The Advantages of a Quick Attach System
- Time Savings: Switching implements becomes significantly faster, maximizing your productive time.
- Increased Efficiency: More time working, less time changing tools, leads to higher daily output.
- Ergonomic Benefits: Reduced strain on your back and body during implement changes.
Potential Drawbacks to Consider
- Initial Cost: Quick attach kits represent a significant upfront investment. However, the long-term savings in time and effort often outweigh this initial cost.
- Installation Complexity: Installation can be moderately challenging, requiring some mechanical aptitude. Professional installation may be necessary for some users.
Maintaining Your Kit for Long-Term Performance
Regularly inspect the quick-attach system for wear and tear. Lubricate moving parts as recommended by the manufacturer. This simple maintenance significantly extends the kit's lifespan.
Comparison of Quick Attach Kits (Example)
| Feature | Kit A | Kit B | Kit C |
|---|---|---|---|
| Category | 1 & 2 | 1, 2, & 3 | 2 & 3 |
| Material | Steel | High-Strength Steel | Cast Iron |
| Price | $500 | $750 | $1000 |
| Warranty | 1 Year | 2 Years | Lifetime |
Remember, don't hesitate to seek assistance if needed. A properly installed quick attach kit will dramatically improve your tractor's efficiency and ease of use.